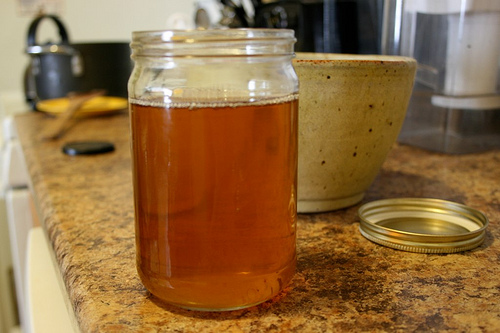
photo provided courtesy of affairsofliving.com
What is Ghee?
Also known as butter oil (or in my house, liquid gold), ghee is pure butter fat that has been separated from the milk proteins through heating. To clarify (ba-dum-ching!), clarified butter and ghee are not the same, despite popular opinion. Ghee is clarified butter that has been cooked longer to remove all the moisture, and the milk solids are browned (caramelized) in the fat and then strained out. This gives a rich nutty taste and fragrance, with hints of caramel, and a smooth, rich, velvety texture. It can be used 1:1 for butter, shortening, or oil in any recipe, and has a high smoking point, making it perfect for high heat sauteing or roasting. Ghee has a long shelf life, both refrigerated and at room temperature. In cold temperatures, it will become solid, and it will remain liquid at warmer temperatures.
Because dairy proteins and lactose have been removed, many dairy intolerant and allergic people are able to tolerate ghee. It is traditionally used in Indian cuisine and Ayurvedic medicine, and is treasured as a digestive stimulant. It can also be used topically for massage or dry skin.
If you want to purchase pre-made ghee, Pure Indian Foods and Purity Farms are both excellent. However, these will put a dent in your wallet – a 14 oz jar will cost you between $10 – $15. If you want to save some major dollar, you can make the same amount of homemade ghee for the cost of a pound of good butter and a little time, and save yourself half the cost. Okay, let’s get cooking!
 Tips & Tricks
Use high quality, organic butter. I could write a whole article about why organic butter is better, but I’ll spare you the lip service and send you to this article instead. In terms of store-bought organic butter, I like Organic Valley Cultured Organic Butter and Cultured Organic Pasture Butter (the pasture butter is grass-fed), Trader Joe’s Organic Butter, Hope Creamery Organic Butter (local to Minnesota), or PastureLand Organic Butter (my favorite one – local to Minnesota and grass-fed!). I’ve been wanting to try Kerrygold Irish Butter for a long time, it is grass-fed, and it is supposed to be fantastic, and will be the next butter in my shopping cart. Grass-fed butter will be higher in antioxidants, natural beta-carotene, omega-3 fatty acids, and conjugated linoleic acid (CLA) than butter made from milk of grain-fed cows. If you can’t find it locally at co-ops or from local producers at your farmers markets, sources of grass-fed butter online include Grass-Fed Traditions and PastureLand’s website.
You could probably also use goat milk butter if you prefer to avoid cow dairy all together. Meyenberg sells goat milk butter that is pretty awesome – it is pure white, with a rich grassy flavor, and that distinctive goaty bite. I buy it when I really want to treat myself to a fancy buttery treat, and am able to find it a the local co-ops in my area. The flavor of goat’s milk ghee will be probably have more of a bite than cow’s milk ghee, but I imagine it would be quite delicious.
Make sure your pans, measuring cups, and sieves are dry and free of moisture. Moisture will interfere with the freshness and shelf stability of the ghee.
Use low heat. Medium or high heat leads to burned ghee, which is very sad. Be patient. Good ghee comes to those who wait.
Watch it closely. I know what they say about a watch-pot, but you’ll want to keep a close eye on that pot of ghee. Watch how it changes and make sure that it isn’t smoking or doing anything crazy, especially in your first batches. Besides, melting butter smells nothing short of heavenly, so watching over an entire pound of it bubbling away is a pretty nice sensory experience.
Do not stir it! If you stir it, you will dislodge all those little dairy solids from the bottom of the pot and mix them back in. Be careful when skimming the top, and do not scrape the bottom. When pouring the ghee out from the pan, do it slowly and gently.
If you have a Ghee Fail, try try again. A Ghee Fail is almost as sad as a sour jar of kombucha or a spoiled batch of sauerkraut. But if it happens to you, don’t be intimidated. Although the steps are simple, this is a delicate process with room for error, as with any cooking project. I’ve messed up more than one batch of ghee in my day. It is easy to burn it, and other strange things can happen. Perhaps your heat was too hot, maybe you cooked it too long, maybe your butter was wacky, or your pot doesn’t distribute heat evenly. Whatever it is, just try it again, because it will probably work better the next time. Get back on that buttery horse and ride again, friend.
How to Make Ghee
This process is really simple. It requires about 30-45 minutes of cooking time, but that may vary depending on the type of pot you use, how chilled your butter is, or the heat of your flame. Basically, the key is keeping the heat low and using dry pots and utensils. Be patient, cook it slowly, and watch it closely. Don’t be intimidated if you screw up and burn it – I have burned more than one batch of ghee in my day. Just try it again and watch it more closely next time! Use ghee in place of butter or oil in any recipes.
 ingredients
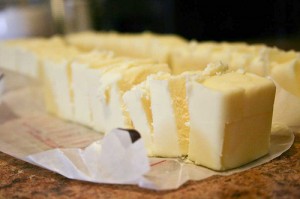
1 pound unsalted organic butter
kitchen tools
saucepan
metal fine sieve
unbleached coffee filter or cheesecloth
heat-proof bowl
1 pint glass jar
directions
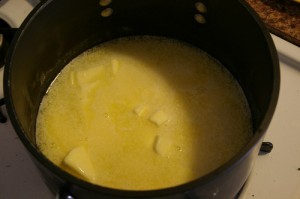 1. Cut up butter in small chunks and place in a dry saucepan. Turn heat over medium and let butter melt. Then reduce heat to low. Make sure you reduce heat otherwise you risk burning your ghee. Slowly let ghee cook undisturbed – do not cover or stir – and you will notice it going through a series of changes.
2. Eventually, you will notice a layer of foamy dairy solids. The foam will reduce, and will reveal the ghee below. This is a good sign. Let it keep on sputtering away…
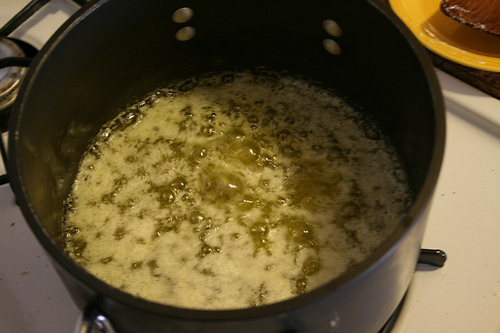
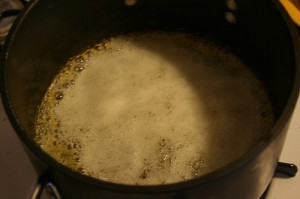 3. Gradually, it will foam a second time. Now your ghee is done, and remove from heat. Skim off most of the thick foam. You will notice the ghee underneath is golden, and there should be a layer of thick, darn dairy solids on the bottom of the pot. Let cool 10-15 minutes.
4. While ghee cools, line the seive with a coffee filter or a double layer of cheesecloth, and place sieve on top of a bowl. Pour cooled ghee through lined sieve gently and slowly, working in batches. Make sure not to disturb the settled dairy solids in the bottom of the pan.
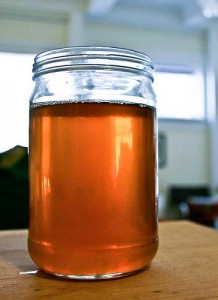
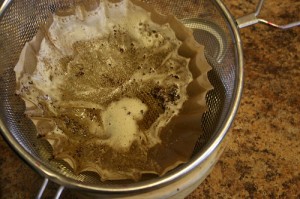 5. Then pour ghee into the jar and let cool completely before screwing on the lid. I usually lay a cloth over the top of the jar to keep out dust and any curious little bugs while it cools. Because the dairy solids are gone and it is pure fat, ghee can be kept at room temperature without spoiling, however, I often keep mine in the fridge. Ghee will solidify in cool temperatures; melted ghee is a dark golden color, while solid ghee is a lighter yellow. Whether in the fridge or at room temperature, make sure to keep well sealed, make sure that all moisture stays out of jar, and use clean, dry utensils to scoop it out in order to ensure freshness.
makes about 1 3/4 cups
recipe courtesy affairsofliving.com








when i make ghee i always have one jar for pure ghee and another to mix with pure coconut oil.the mix is too good.